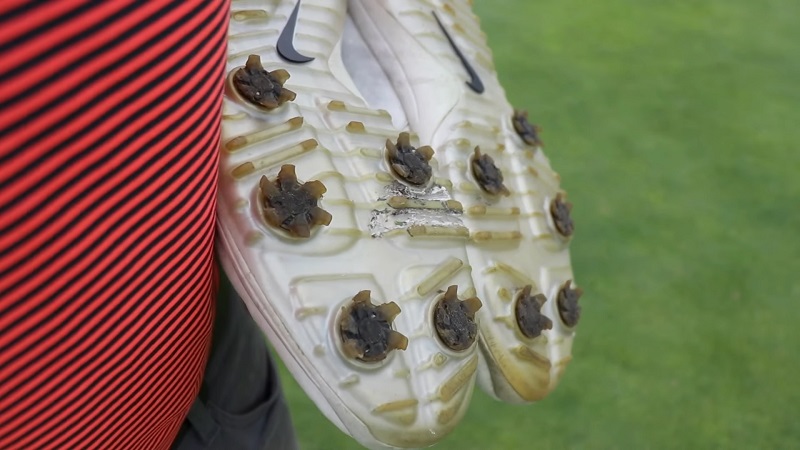
Golf means different things to different people, but one thing’s for sure: finding a comfortable pair of shoes that provide traction and allow you to hit the ball consistently is just as important as having the right club. Unfortunately, spikes can easily get clogged or damaged over time, causing them to become worn out and less effective on the course.
But there are some easy steps you can take yourself at home to remove your old spikes and replace them with new ones in no time! Read on to learn how to effortlessly revive your golf shoe game without leaving your house.
Why Should You Replace Golf Shoe Spikes?
Replacing golf shoe spikes is essential for several reasons:
- Traction and Stability: The primary function of golf shoe spikes is to provide traction on the golf course. Worn or damaged spikes can compromise this traction, making it difficult to maintain stability during your swing. Replacing spikes ensures you have the necessary grip for a solid foundation during your shots.
- Improved Performance: Golf is a game of precision, and even a small slip or loss of stability can affect your performance. New spikes contribute to better overall shoe performance, allowing you to execute swings more accurately and consistently.
- Prevention of Slipping and Sliding: Worn spikes can lead to slipping and sliding, especially in wet or uneven conditions. This not only affects your performance but also increases the risk of injury. Regularly replacing your golf shoe spikes minimizes the chances of accidents on the course.
- Extended Shoe Lifespan: The spikes on golf shoes undergo a significant amount of stress with each round of golf. If left unchecked, worn spikes can damage the shoe’s sole and structure. By replacing spikes regularly, you extend the overall lifespan of your golf shoes, saving you money in the long run.
- Course Maintenance: Golf courses often require players to maintain proper etiquette, including taking care of the course. Worn spikes can contribute to turf damage, especially on softer surfaces. By using new spikes, you reduce the impact on the course, contributing to its overall health and playability.
- Adaptation to Course Conditions: Different golf courses have varying conditions, from soft, lush fairways to harder, drier terrain. Having fresh spikes allows you to adapt to these conditions more effectively, ensuring you have the right grip for the specific challenges each course presents.
- Comfort and Support: Worn spikes can also affect the overall comfort and support provided by your golf shoes. New spikes help maintain the shoe’s original design and functionality, offering better support for your feet throughout the game.
What Kind Of Tools Do You Need Before Starting To Remove Spikes?
In order to replace your spikes you will need:
- A spike wrench or spike key
- A pair of pliers
- Replacement spikes
- Golf shoe cleaner or conditioner
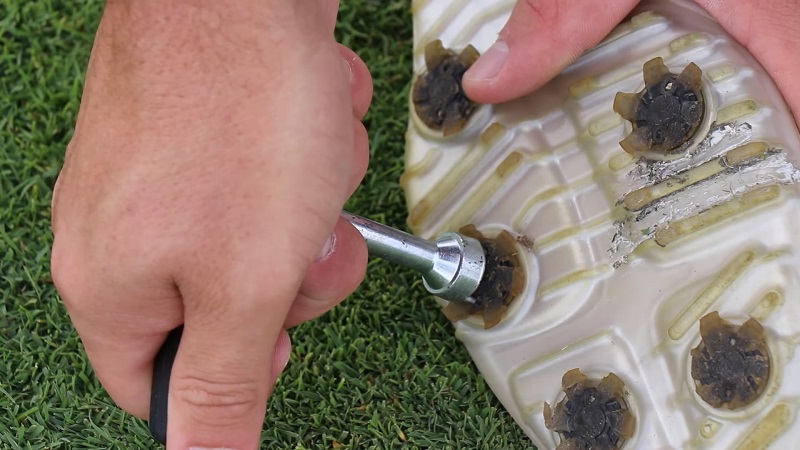
How To Remove The Old Golf Spikes
Begin by extracting the insole from your shoes, providing better accessibility to the spikes. Employ a golf spike wrench, affix it to an aged spike, and rotate it in a counter-clockwise direction with moderate force. Continue this process systematically, extracting each spike until the shoe’s sole is marked only by empty holes.
Ensure to gather any remnants of material that might have adhered to the soles during spike removal. Subsequently, cleanse the surface, eliminating any dust or dirt, in preparation for the installation of new spikes. By diligently adhering to these steps, you can proficiently disengage the old golf spikes from your shoes.
How To Replace Golf Spikes
Before you start replacing new golf spikes, make sure that all of the new spikes you have are the same size and shape as the ones you’ll be removing.
- Using your golf spike wrench, attach the new spike at one of the holes on the sole and turn it clockwise with moderate force until it’s securely in place.
- Repeat this process for all of the other spikes, one by one.
- Then, clean any pieces of material that may have been stuck to the sole after screwing in the new spikes, and put back the insole of your shoes.
- Once all of the new spikes have been fitted, double-check that they’re securely in place and that there isn’t any excess material sticking out.
How To Remove Stuck Golf Spikes
Sometimes, the old spikes on your shoes might become stuck due to too much use or a corrosion layer. In this case, try using a stronger golf spike wrench and unscrewing it with more force.
If that doesn’t work, you can also try using oil or WD-40 as a lubricant on the screw thread to make removing it easier.
If none of these methods work, the spike might have become too stuck for you to unscrew, and you should ask a professional for help.
How To Clean Your Golf Spikes
Cleaning your golf spikes regularly will help them last longer, maintain a better grip on the ground during your game, and keep your shoes looking good for longer. Make it a habit to clean your golf spikes after each game; you will surely benefit from it.
- Remove your shoe’s insole and remove the old spikes with a golf spike wrench.
- Take a small brush dipped in warm water and scrub each of the removed spikes with it until there is no dirt left on them.
- Place the spikes onto a towel to let them air dry completely.
- Once dry, put a few drops of lubricant oil onto each spike.
- Put the spikes back into the sole of your shoes and screw them in with a golf spike wrench.
- Clean any pieces of material that may have been stuck to the sole after screwing in the new spikes, and put back the insole of your shoes.
- Check if all of the spikes are securely in place and that no excess material is sticking out.
- Your golf spikes are now clean and ready to be used again!
When Do You Know When to Remove and Change Golf Shoe Spikes?
Signs that it’s time to remove and change your golf shoe spikes include visible wear and tear, loss of grip, and difficulty maintaining balance during swings. Additionally, if you notice that your shoe is not sitting level on the ground, it may be a sign that the spikes need to be replaced.
For most golfers, this means doing so every 12-15 rounds or twice over the season. However, if you play more frequently, you may need to switch them out more often, while those who play less often may be able to go longer before needing replacements.
Conclusion
As we have seen in this article, learning to remove spikes from your golf shoes is easy and only takes a few minutes. You don’t need to buy fancy tools or special supplies—just an old screwdriver and a pair of pliers will do the trick! Additionally, it’s important to mention that you should always buy golf shoes with screw-in cleats, as these are generally stronger and more reliable than those with twist-on cleats.
Following the steps outlined in this post, you can maintain your golf shoes for years by trading out old spikes for new ones. Taking the time to care for your footwear will improve your performance on the course, so get out there and start swinging!
FAQs
How Often Should I Change My Golf Shoe Spikes?
If you’re a frequent golfer, you may need to change your spikes every few months to maintain your shoe’s effectiveness. To avoid potential hazards and ensure better performance, it’s best to check your spikes before every game. If you notice that they are worn down or damaged, it’s time to replace them. For most golfers, this means doing so every 12-15 rounds or twice over the season.
What Should I Consider When Changing My Golf Shoe Spikes?
When changing your golf shoe spikes, make sure to use the right tools and not apply too much pressure, as this could damage the grooves of the spikes. Also, check periodically if any of them have become loose or need replacing.
Are Rubber Spikes Or Metal Spikes Better?
It all depends on your preferences and the type of surface you will be playing on. Rubber spikes provide more grip, while metal ones offer better stability.
How Long Should My Spikes Last?
This depends on the type of spikes you use and how often you play. Generally, they should be replaced after 1-2 seasons or when they start to wear off.
What Kind Of Lubricant Should I Use For My Spikes?
The best lubricant for golf spikes is an oil-based lubricant, such as Teflon lube or WD-40. It will help keep the screws from becoming corroded and make them easier to unscrew when it’s time to change your spikes.
Should Spikes Be Tight Or Loose?
While it is important to securely fasten golf spikes, avoiding excessive tightness is crucial. Loose spikes can cause instability during your swing, while overly tight ones can lead to discomfort and impact your performance on the green. Finding a comfortable and easy-to-control fit is essential for optimal play.